Finding Storage Space In Your Garage
Build a garage, accumulate stuff, park the car outside the garage.
Build a garage, accumulate stuff, park the car outside the garage.
It's so easy to let that happen, isn't it? Our garage is overflowing, and winter
is not kind to vehicles up here in Alberta. There was valuable real estate going
to waste up near the ceiling in our garage. I just had to figure out how to build
some shelves that wouldn't interfere with our rolling chrome racks, so I sat down
with my notepad (if I tried the plans in Sketchup, you would likely never see this
post!), and here is what I dreamed up.

The wall space in our garage is taken up with tall chrome shelves, leaving no room for support brackets from underneath, so I had to come up with a way to attach them to
the ceiling. I did a test run using mostly scrap lumber. When my husband came
home from work he was pretty surprised at the difference one shelf made.
So he and I put another one up together. And another. We are now on shelf number
three. So far we have added a total of forty-eight square feet of storage.
Update: We just finished installing three more, and can now park the car IN
the garage! Yay! This is a simple build, but you will need an extra pair of hands
the garage! Yay! This is a simple build, but you will need an extra pair of hands
to do some of the steps. Good luck, and be careful with those power tools!
Here's what we needed to build one:
5 - 2"x3" @ 8' long
1/2 sheet 1/2" plywood,should measure just under 24"W and 8 feet long.
1 - 2"x4" @ 8' long. This is the ceiling board.
Scrap piece of 2"x3" or 2"x4" for a ledger, about five feet long.
This is your temporary shelf support.
Here are the tools we used:
Kreg Jig and 2 1/2" pocket hole screws or drill and 3" screws
3 1/2" screws (deck screws or similar)
Air Nailer with 2" nails
Drill
Countersink bit
Miter saw or circular saw
Stud Finder
Tape Measure
Level
Pencil
Cut List:
2 - 2"x3" @ 93" long - Front and Back
2 - 2"x3" @ 24" long - Ends
3 - 2"x3" @ 21" long - Supports
3 - 2"x3" @ 22 1/2" long - Vertical Brackets
1 - 2"x4". @ 8' long - Ceiling Board
Pre-drill and countersink for all screws. Check your shelf for level throughout the process.
Use the stud finder to locate and mark your studs and ceiling joists. These shelves need to be in something solid. Painting all the pieces before assembly is recommended. I left mine unpainted for this post so everything would show up better in the garage light.
Cut your 2"x3"boards and put the frame together with the Kreg Jig, using 1 1/2" pocket holes and 2 1/2" pocket-hole screws. You could also use your drill and some 3" screws.


Next, the ledger. Fasten it to the wall with a couple of 3 1/2" screws.
Make sure it's level. If you are starting your first shelf in a corner you will
also need a ledger on the adjacent wall.

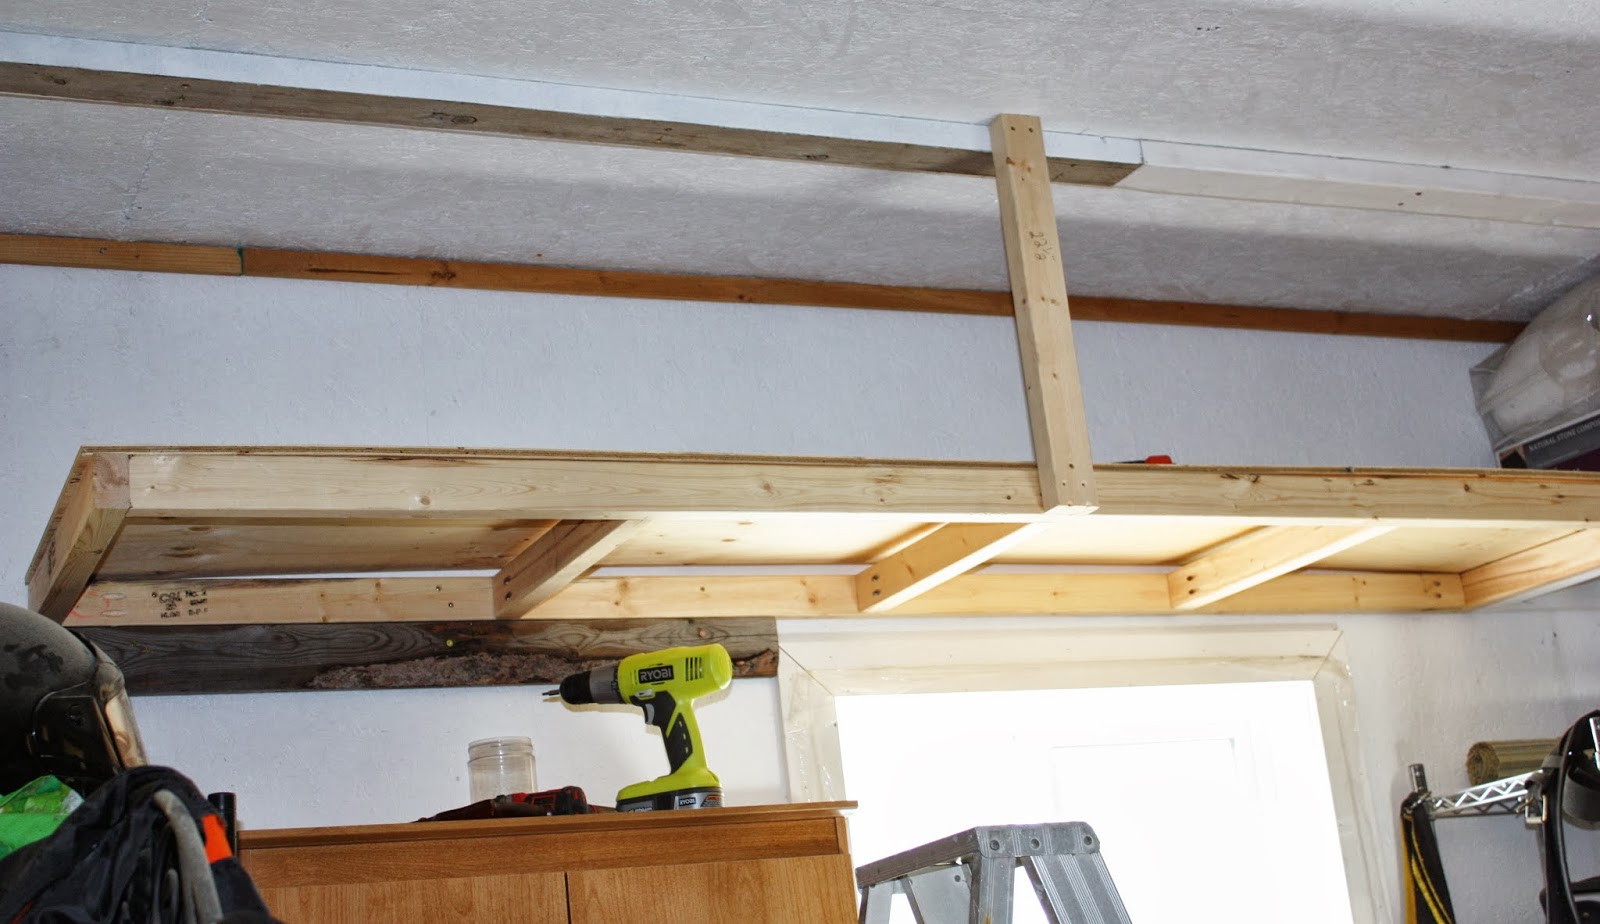
Now for the 2"x4" ceiling board. Draw a pencil line on the ceiling 24" out from the wall, to mark where the outside edge of the 2"x4" will go. Attach the 2"x4" to the ceiling with
3 1/2" screws, making sure you hit the joist marks you drew earlier.
3 1/2" screws, making sure you hit the joist marks you drew earlier.

Lift the frame up so that it rests on the ledger and against the wall.
Fasten the new frame to the previous one using 3" screws.

Attach the frame to the wall studs with 3 1/2" screws.
Fasten one of the vertical supports to the shelf and the ceiling board.
Fasten the new frame to the previous one using 3" screws.

Attach the frame to the wall studs with 3 1/2" screws.
Fasten one of the vertical supports to the shelf and the ceiling board.

Set the plywood onto the frame and fasten
it down using a nailer or 1" screws.

Now the remaining vertical support board can be attached.
Remove the ledger, and you're done!

We have enough room to install one more before we run into the garage door opener.

Last step: Load your shelf with stuff and walk around
your garage without tripping over stuff. Because now you can!
We finally have room to work on projects and we don't have to
scramble to find a place to store things. What a difference!
Have a great day, and Happy Building!
Val
No comments:
Post a Comment
Thanks for stopping by! Your comments make my day!